
How to use Stable Diffusion to create amazing AI generated images
This blogpost is all about using stable diffusion and the different platforms to create AI-generated images. We explain each platform in detail and give you a simple guide on how to use them – step by step. It's a short read, so be sure to read it all because you'll learn a lot about how to use stable diffusion to create images using AI.
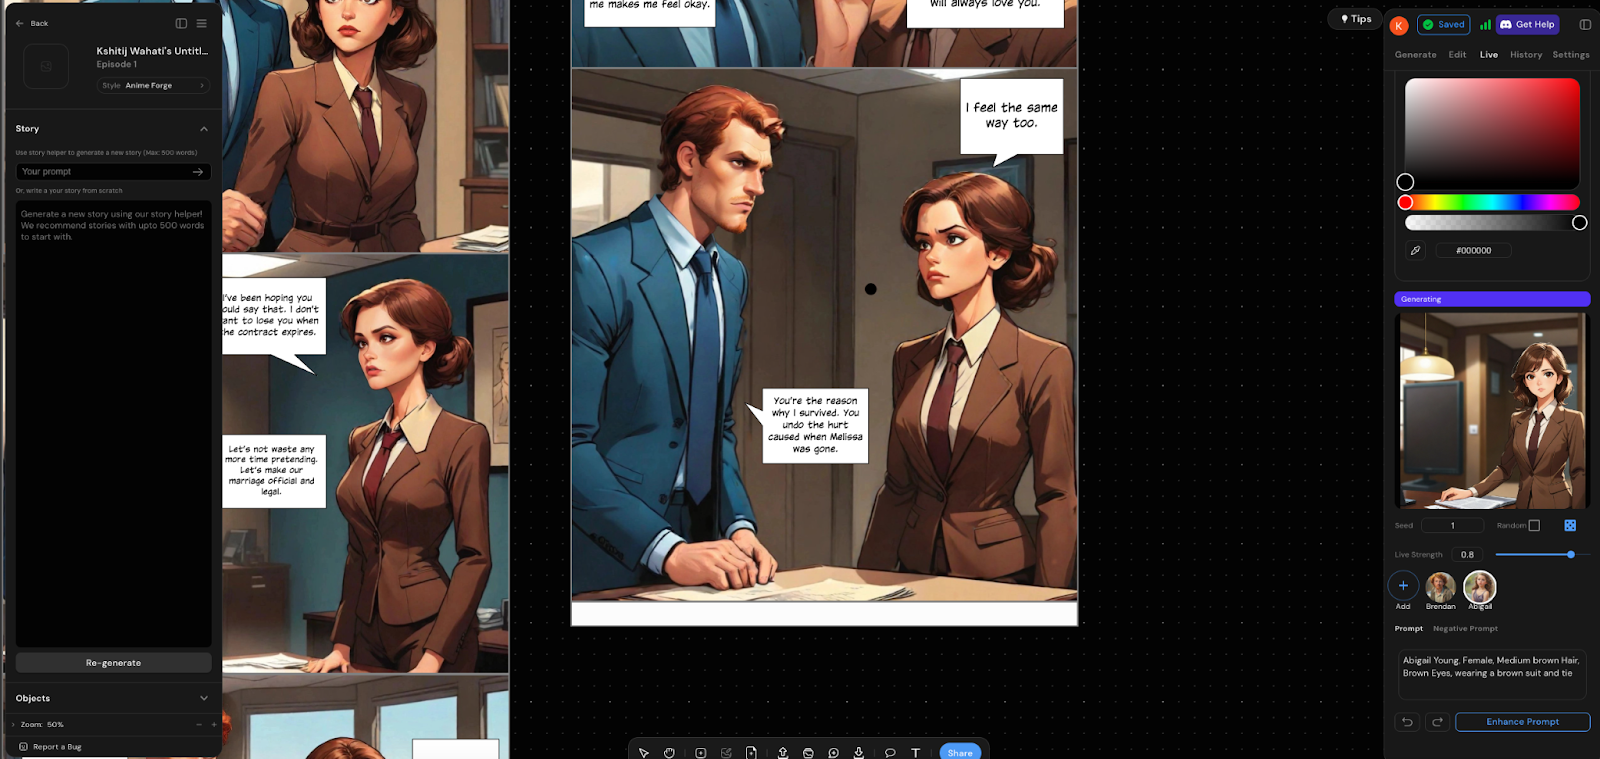
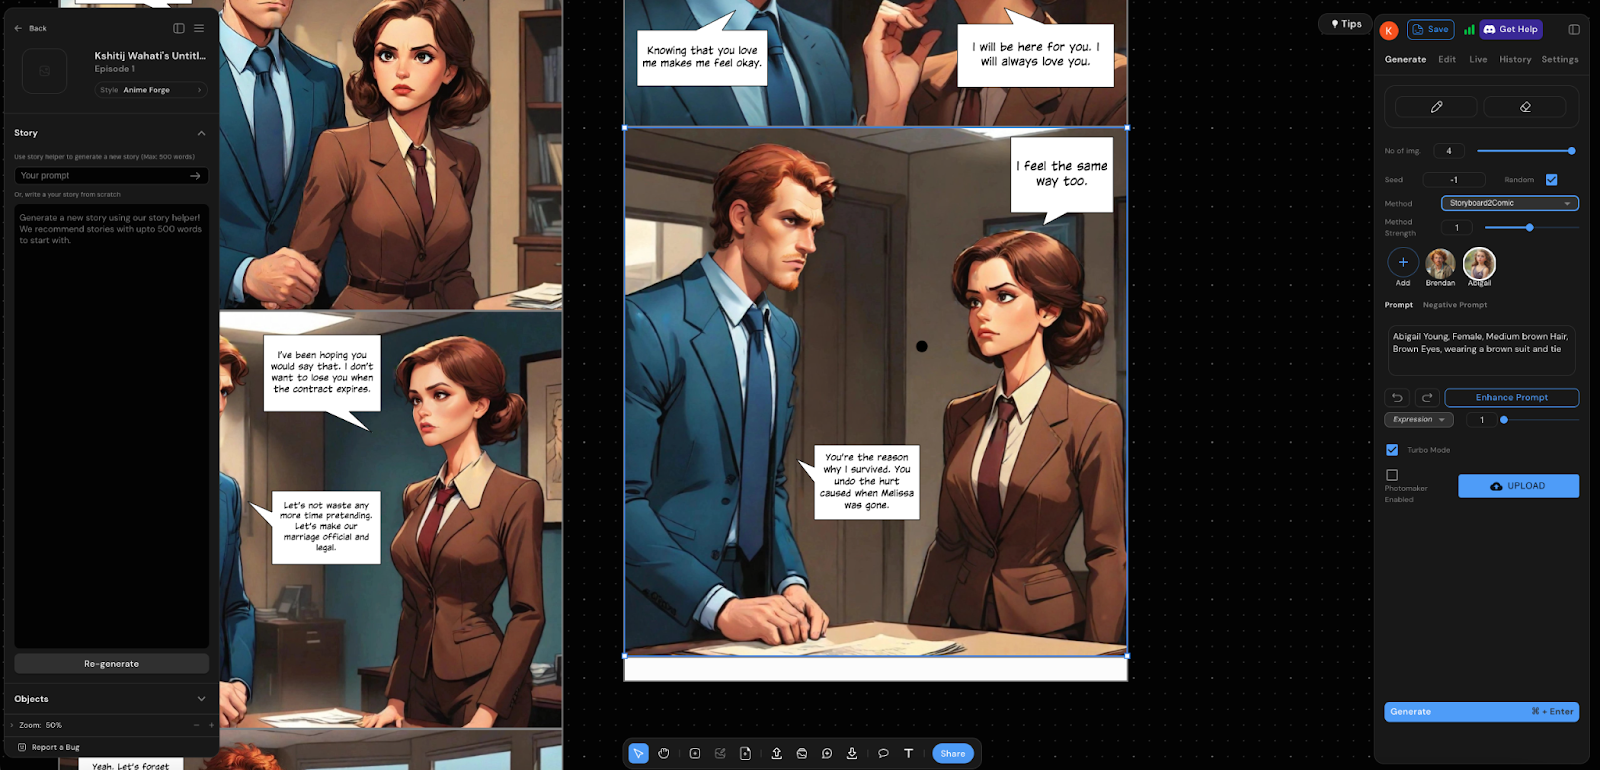
Dashtoon Studio
Dashtoon Studio is a platform powered by AI, designed to facilitate the creation of comics and characters with AI assistance. It offers an easy and intuitive way of using Stable Diffusion and is probably one of the easiest to use platforms on this list.
Key features of Dashtoon Studio include:
- Characters: Access a library of characters or generate your own custom characters that maintain consistency throughout your comic.
- Styles: Choose from a variety of realistic, iconic, anime, manga and manhwa styles from the inbuilt style library
- AI Tools: Utilise various readymade AI tools such as background remover, upscaler, and more for enhanced comic creation.
Follow the below steps to use stable diffusion on Dashtoon Studio:
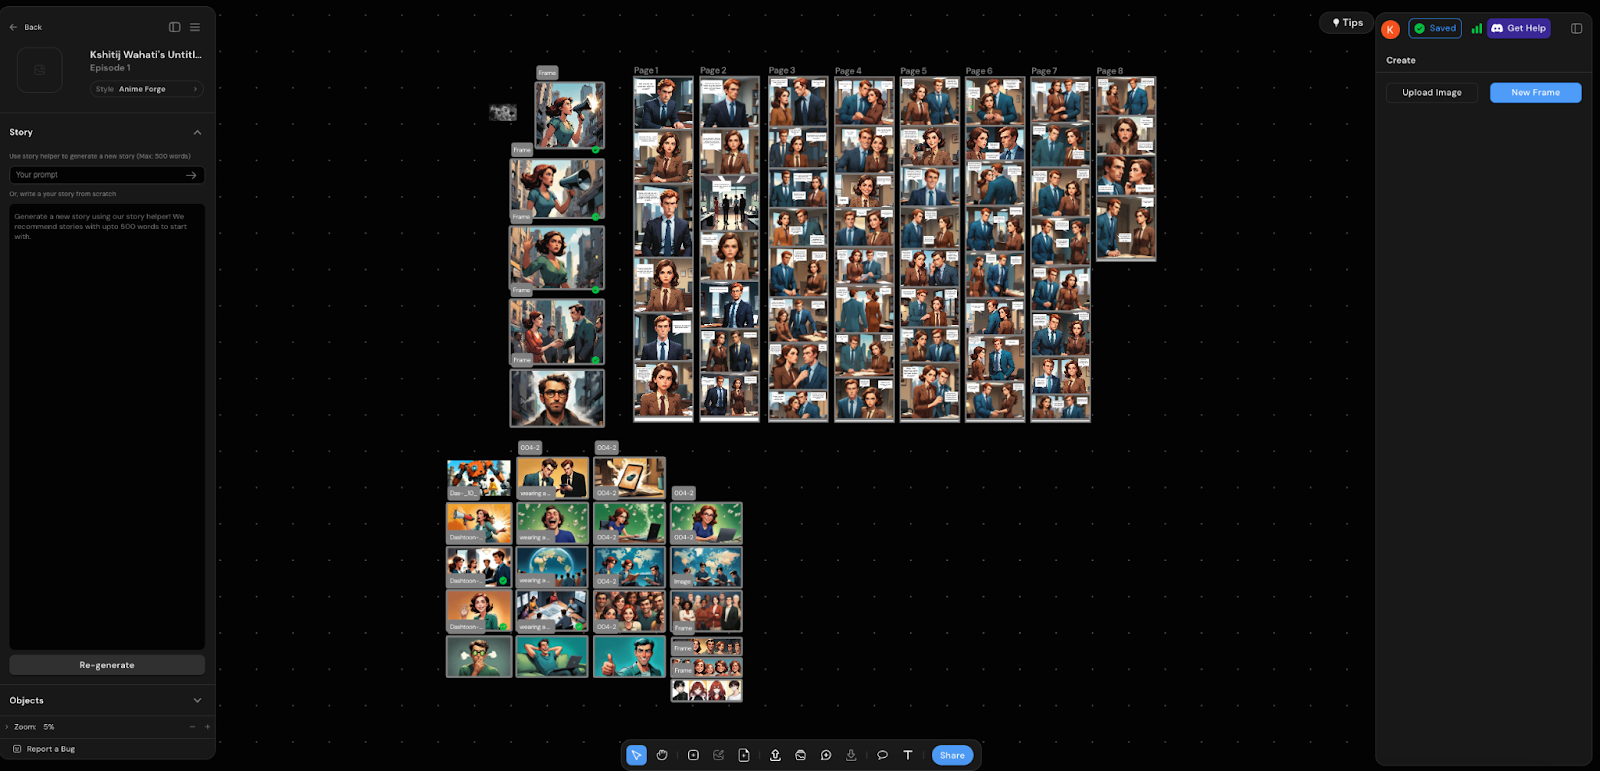
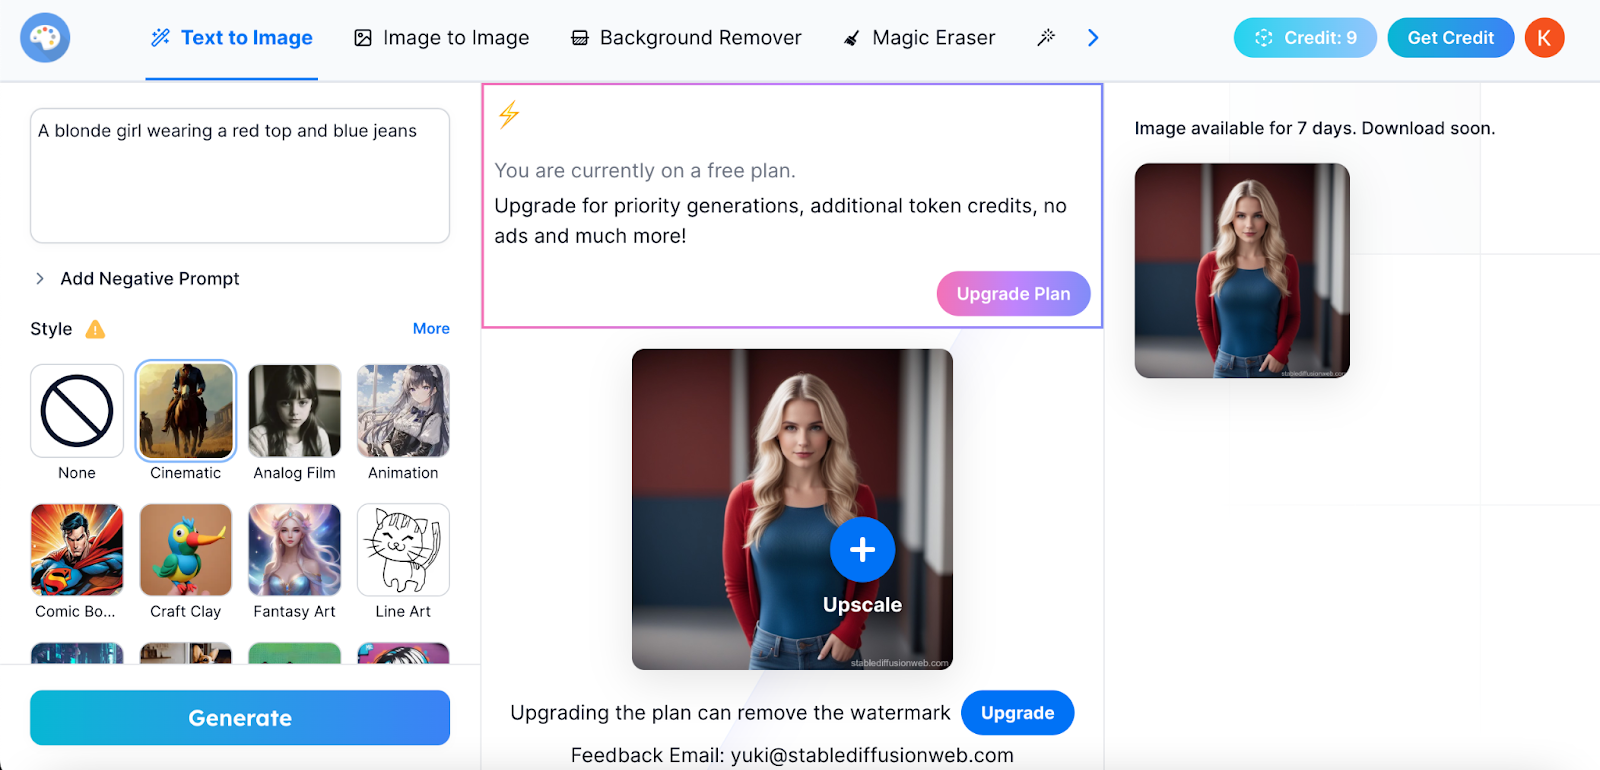
- Pick a Style: Prior to generating any image, you must first click on create a new episode and choose the appropriate style that aligns with the type of image you are trying to create.
- Generate the image: To begin, launch your web browser and navigate to Dashtoon Studio. Create a new comic project. Add a new image to your comic by selecting the option to generate a new frame in the menu at the bottom of the screen. Write a prompt describing the image you want to create. Specify the number of images you want to generate at one go. Click the "Generate" button to create the images based on your prompt.
- Selecting an Image: After the images are generated, you will be prompted to select the one that meets your satisfaction. Choose the preferred frame to use as the image for your frame.
Stable Diffusion Online
Stable Diffusion, a generative artificial intelligence model (generative AI), crafts distinctive photorealistic images based on text and image prompts. Initially introduced in 2022, the model extends its capabilities beyond images to include video and animation creation. Rooted in diffusion technology and harnessing latent space, it minimises processing demands, enabling operation on desktops or laptops with GPUs. Furthermore, through transfer learning, the model adapts to individual requirements, requiring as few as five images for fine-tuning. Stable diffusion online is an easy to use website to use stable diffusion to generate images on the web.
Key Features
- Text-to-image generation is a prevalent application of Stable Diffusion Online, where images are generated based on textual prompts. By adjusting the seed number or denoising schedule, users can produce various images with distinct effects.
- Image-to-image generation involves creating images from an input image and textual prompt, such as using a sketch and relevant instructions.
- The Stable Diffusion Online platform also facilitates the creation of graphics, artwork, and logos using diverse prompts, albeit with unpredictable outputs. Users can guide logo creation using sketches.
- Stable Diffusion Online serves as a tool for image editing and retouching, employing an AI Editor to edit photos by defining prompts. This includes repairing old photos, removing objects, altering features, and adding elements.
- Generate the image: Please utilise your browser to visit the Stable Diffusion Online website and simply click on the "Get started for free" button. Once there, express your prompt in the designated field by describing the image you wish to create. Finally, click the "Generate image" button. As a result, the site will promptly present you with four default images for your consideration.
- Select an Image: Select any of the four generated pictures to enlarge it for better viewing. Easily switch between the four images by clicking on their respective thumbnails. Additionally, you can access your browser's menu by right-clicking on an image, granting you the options to save, copy, or email the image as needed.
- Generate a new image: If you find that none of the suggested images meet your preferences, simply give it another try. Maintain your original prompt and click the "Generate image" button to explore four new images aligned with your description.
Hugging Face
Hugging Face empowers users to develop interactive, in-browser demonstrations of machine learning models, facilitating easier showcasing and testing. Moreover, Hugging Face actively participates in collaborative research initiatives, such as the BigScience research workshop, with the goal of advancing Natural Language Processing (NLP) technology.
Key Features:
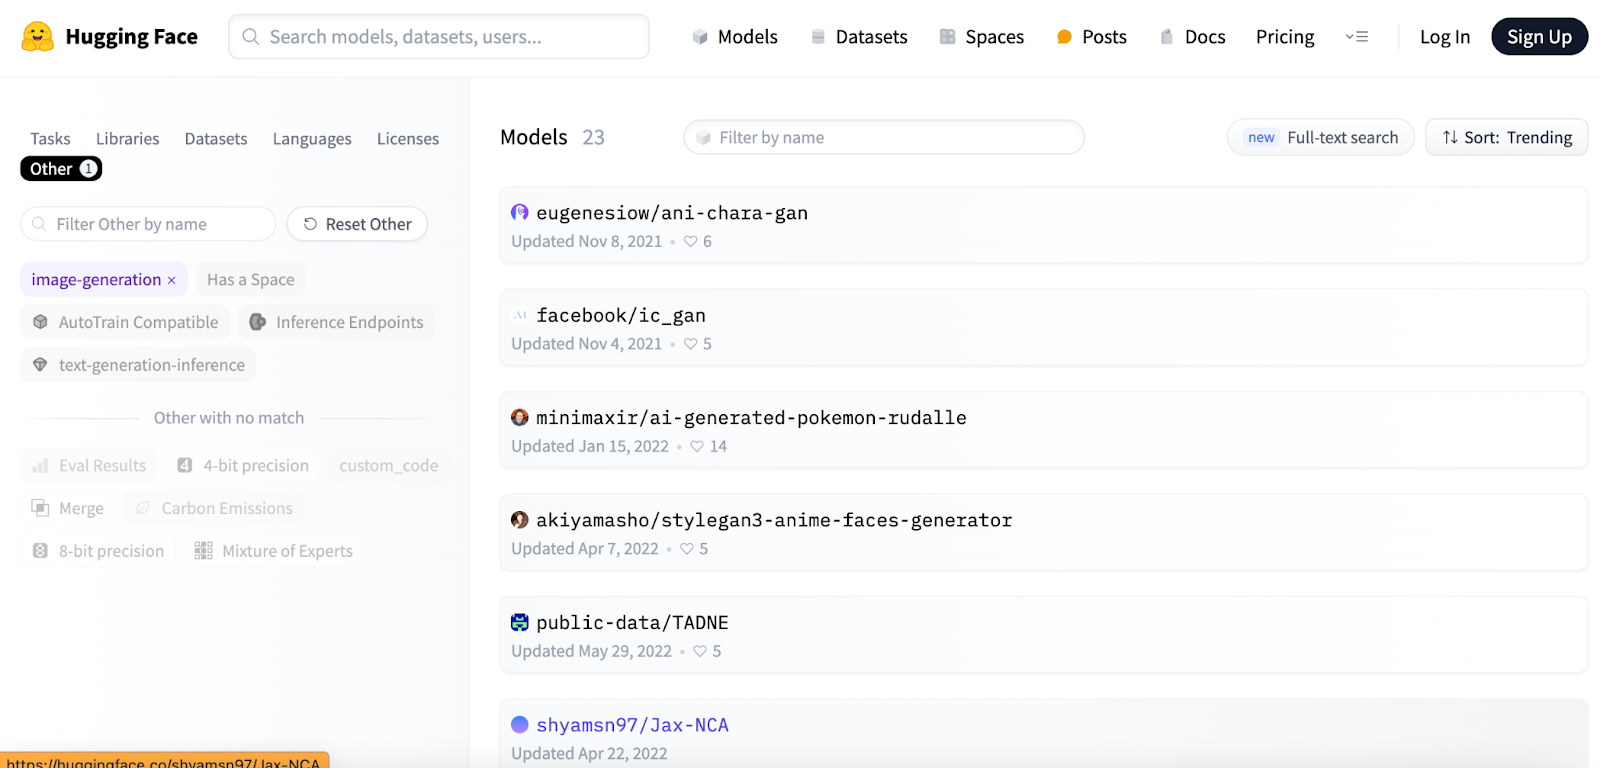
- Hugging Face boasts an extensive repository of models that users can conveniently filter by type, boasting over 300,000 models currently available. Among these, some of the top-performing open-source ML models on the platform include stabilityai/stable-diffusion-xl-base-1.0, WizardLM/WizardCoder-Python-34B-V1.0, and Phind/Phind-CodeLlama-34B-v2.
- In addition to models, Hugging Face provides access to diverse datasets uploaded by the community, facilitating model training by offering datasets like the_pile_books3 (a collection from Bibliotik), wikipedia, Anthropic/hh-rlhf (human preference data about AI outputs), and imdb (a vast compilation of movie reviews).
- Spaces, another offering from Hugging Face, simplifies the implementation and demonstration of machine learning models. It offers user-friendly packaging, eliminating the need for technical expertise. Examples of Spaces include LoRA the Explorer (an image generator), MusicGen (a music generator), and Image to Story (an image-driven story generator powered by large language models).
- Generate an image: Explore another platform utilising the Stable Diffusion model called Hugging Face. Simply navigate to the website and input your description in the provided prompt.
Furthermore, you'll find an additional field labelled "Negative prompt" where you can specify any elements you prefer not to have in the image. Once you've entered your prompts, click on the "Generate Image" button to receive four images tailored to your specifications.
- Select an image: Select a particular image to examine it further. Utilize the right-click option on the image to either save or copy it according to your preference.
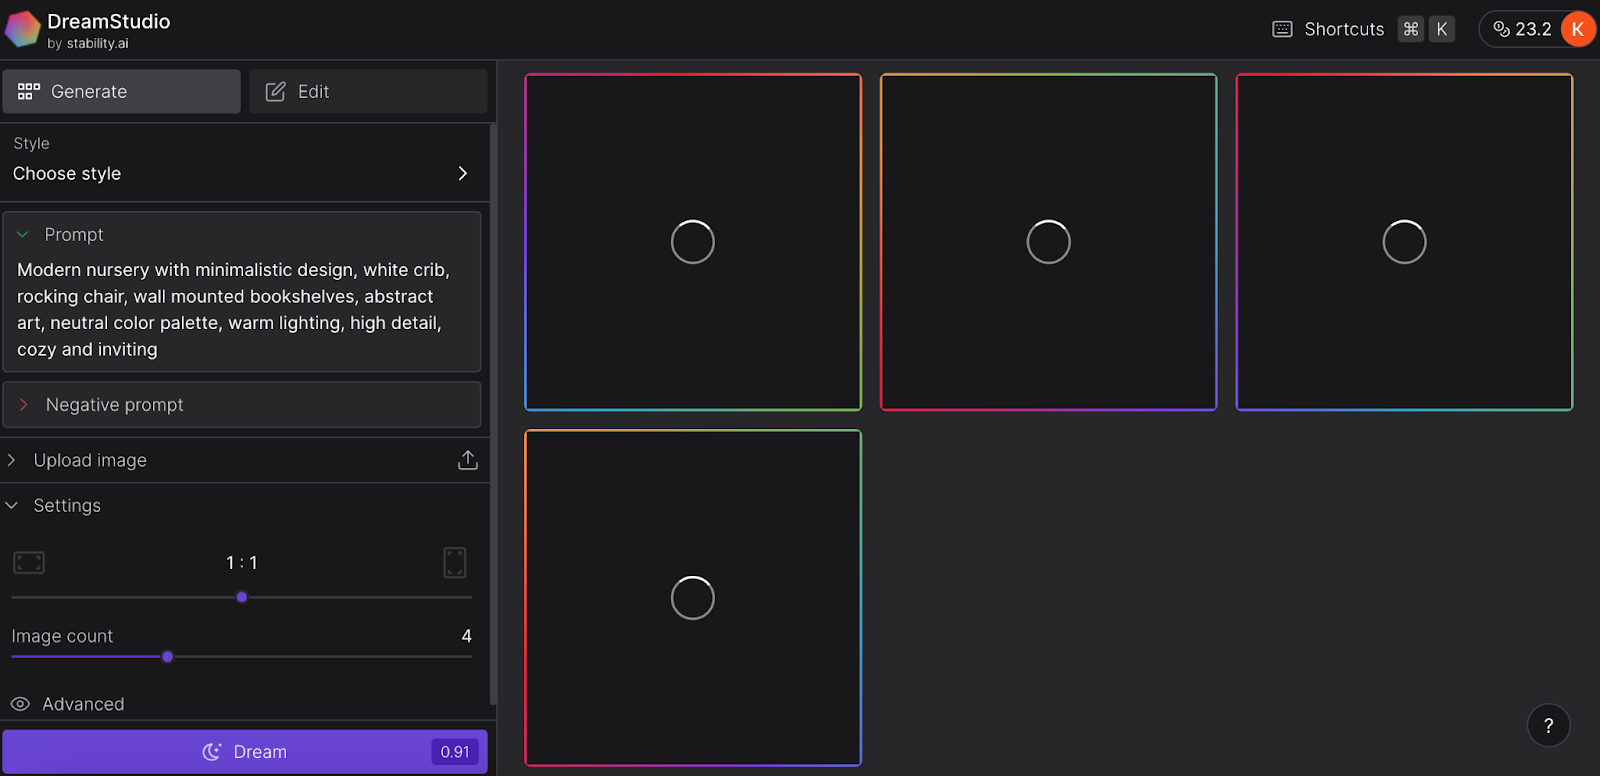
Dreamstudio
DreamStudio offers access to use the Stable Diffusion model online. To begin, sign in using any supported account. Upon signing in, you'll receive a certain number of complimentary credits for generating images. If you exhaust these credits, additional credits can be purchased to continue using the platform.
To access DreamStudio, navigate to the Stability.AI login page. From there, you can either sign in using your existing Google or Discord account or opt to create a new account by clicking the sign-up link. After successfully logging in, you'll be directed to the DreamStudio website.
To configure your image generation preferences, follow these steps. First, select your preferred Stable Diffusion model version by clicking on the "Model" field, choosing from production versions or the latest beta. Then, customise the style of your image by clicking on the "Style" field, where options include Anime, Photographic, Comic Book, Cinematic, or 3D Model.
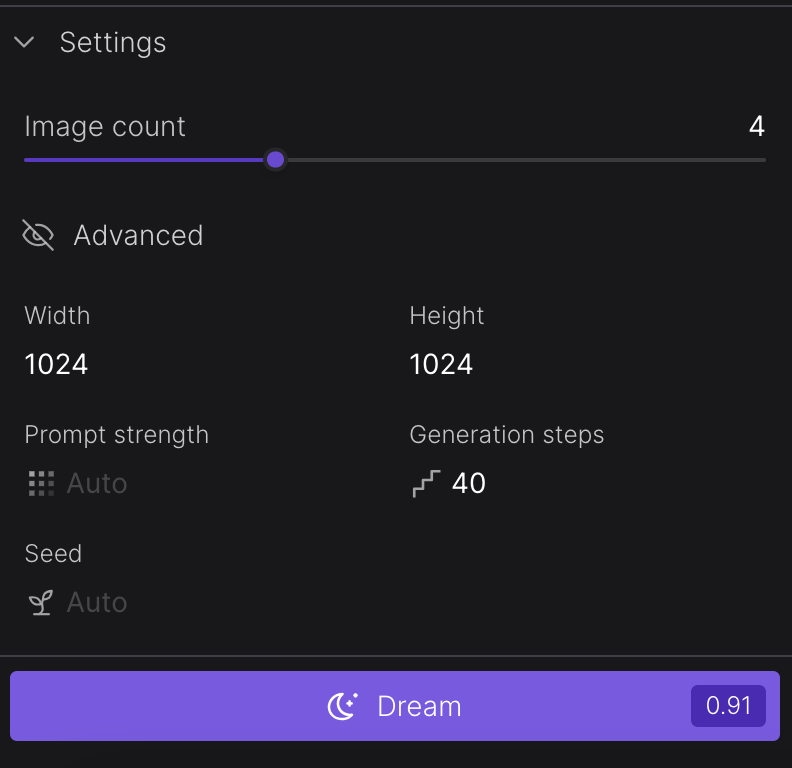
Adjust the image size using the first slider under "Settings," and specify the number of images you'd like to generate using the second slider.
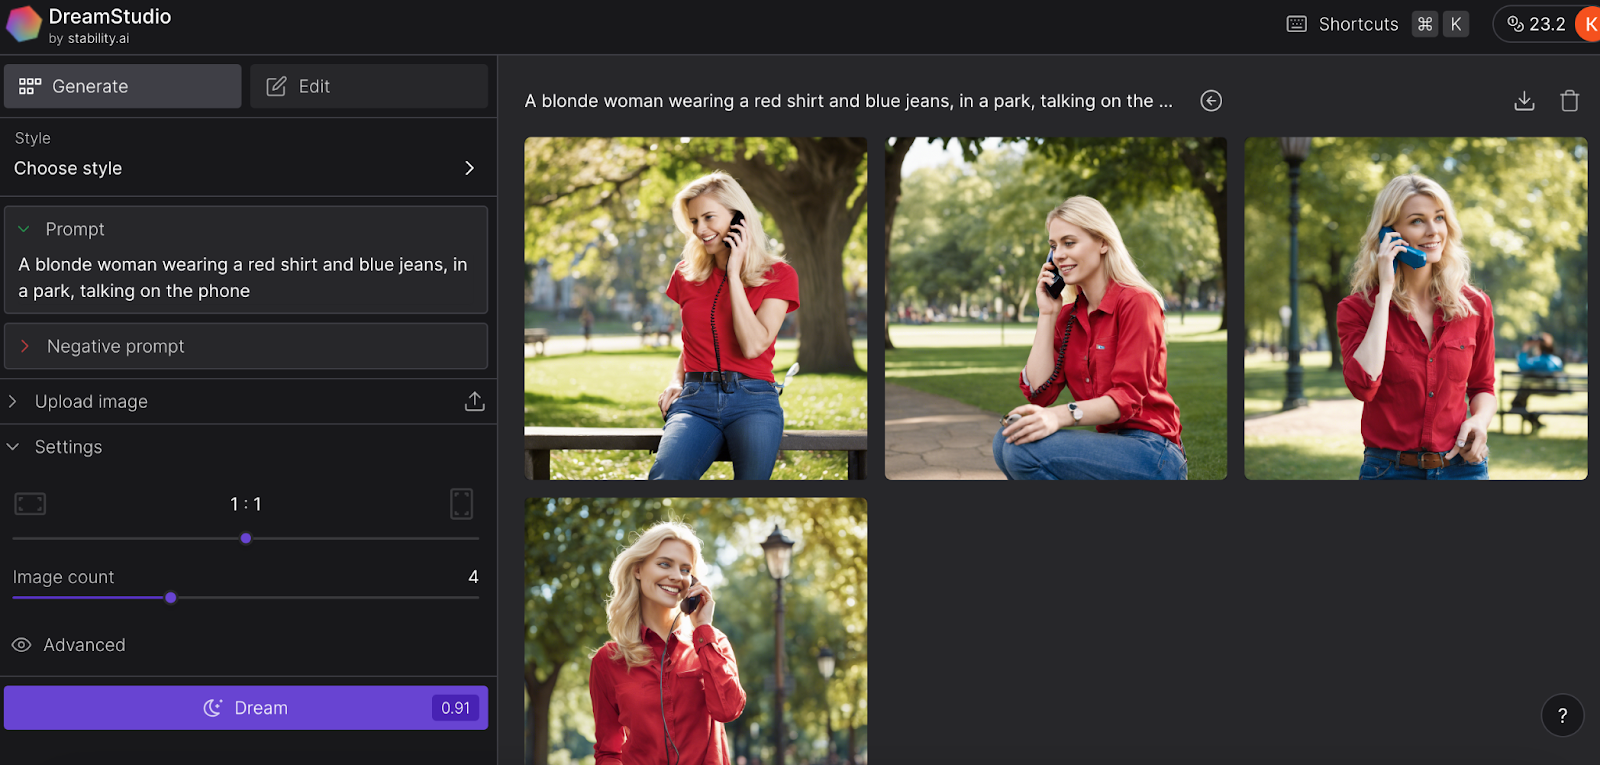
- Generate an image: Enter your text description into the provided prompt. Additionally, you have the option to exclude specific elements from the image by listing them in the Negative prompt. Once prepared, click the "Dream" button. As a result, the site will present the designated number of images as per your selection in the Settings.
- Select an image: Select an image to view it in a larger size. Use the right-click option on the image to either save or copy it as desired.
Download and install Stable Diffusion on your computer
Instead of depending on various websites utilising Stable Diffusion, you have the option to install the program directly onto your computer. However, it's important to note that setting up the application can be challenging and involves several precise steps and needs a powerful computer. The upside is that once the setup is complete, you'll have the freedom to run it whenever and as frequently as you desire.
Before diving in, ensure your PC meets the minimum requirements: Windows 10 or 11, and a discrete NVIDIA video card with 4GB or more of VRAM. You can verify the name, model, and VRAM of your video card using the DirectX Diagnostic Tool. Simply press the Win key+R to open the Run box, then type dxdiag in the Open field. In the DirectX Diagnostic Tool window, navigate to the Display tab to view the necessary information.
If your system meets the requirements, proceed with the following steps:
- Install Python: Visit the Python 3.10.6 website. Navigate to the Files section by scrolling down, then select the appropriate link for the Windows installer (64-bit) based on your operating system. Proceed to run the downloaded file to initiate the Python installation process.
- Install Git: Navigate to the Download page for Git for Windows. Select the link provided for the 64-bit Git for Windows Setup. Proceed to install the downloaded file, ensuring to accept all default options during the installation process.
- Download the Stable Diffusion project file: Visit the GitHub page for the Stable Diffusion project file. Locate the green Code button positioned in the upper right corner and choose the option to Download ZIP. Extract the contents of the downloaded ZIP file. This action will generate a folder named stable-diffusion-webui-master. Copy this folder, along with all the extracted files, to a convenient location, such as the root directory of your C: drive.
- Download and set up the checkpoint file: Visit the Hugging Face webpage for the Stable Diffusion checkpoint file. Proceed to click on the download link to save the 768-v-ema.ckpt file. Please note that this is a sizable file, so exercise patience during the download process. Upon completion of the download, navigate to the directory: C:\stable-diffusion-webui-master\models\Stable-diffusion (assuming you have copied this folder to the root of your C: drive). Within this directory, locate a file named Put Stable Diffusion checkpoints here.txt. Copy the 768-v-ema.ckpt file into this folder.
- Download the config yaml file: Navigate to the page containing the config yaml file. The file will be displayed as plain text. Right-click anywhere on the page, then choose the option to Save as. Proceed to navigate to the C:\stable-diffusion-webui-master\models\Stable-diffusion folder and save the yaml file in this directory. Rename the file to 768-v-ema, retaining the yaml extension, resulting in the file being named 768-v-ema.yaml.
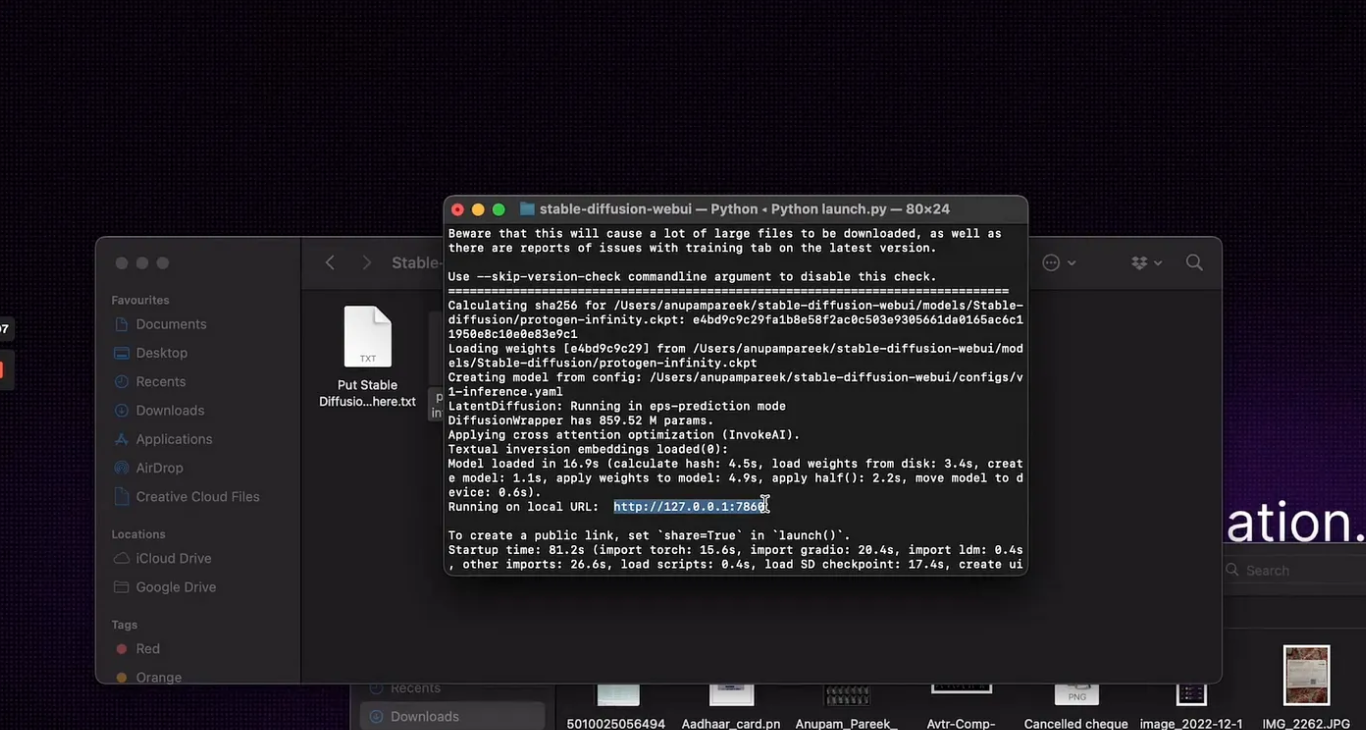
- Run the webui-user.bat file: Navigate to the stable-diffusion-webui-master folder and execute the webui-user.bat file. Within a few minutes, the window should show a line stating: "Running on local URL," followed by a URL featuring the IP address of your local machine along with a port number. Copy and paste the complete URL, including the port number, into your preferred web browser to access the Stable Diffusion application. Ensure to keep the command window open while using the application.
- Generate an image: You are now ready to create an image. Within the Stable Diffusion application, input a description for the desired image in the provided prompt. Optionally, specify any text you wish to exclude in the Negative prompt. If desired, adjust the parameters for Sampling method, width, height, and other settings to your preferences. If necessary, set values for Batch count and Batch size according to your requirements. When everything is set, simply click the Generate button. The application will then display the images based on the count you requested.
How to use Stable Diffusion with Clipdrop
Clipdrop offers an AI image editing service, featuring access to Stable Diffusion XL, the latest model in the Stable Diffusion series. It's remarkably user-friendly, making it an ideal platform for experimenting with generative AI models. The best part is, there's no need for an account to generate images using Stable Diffusion.
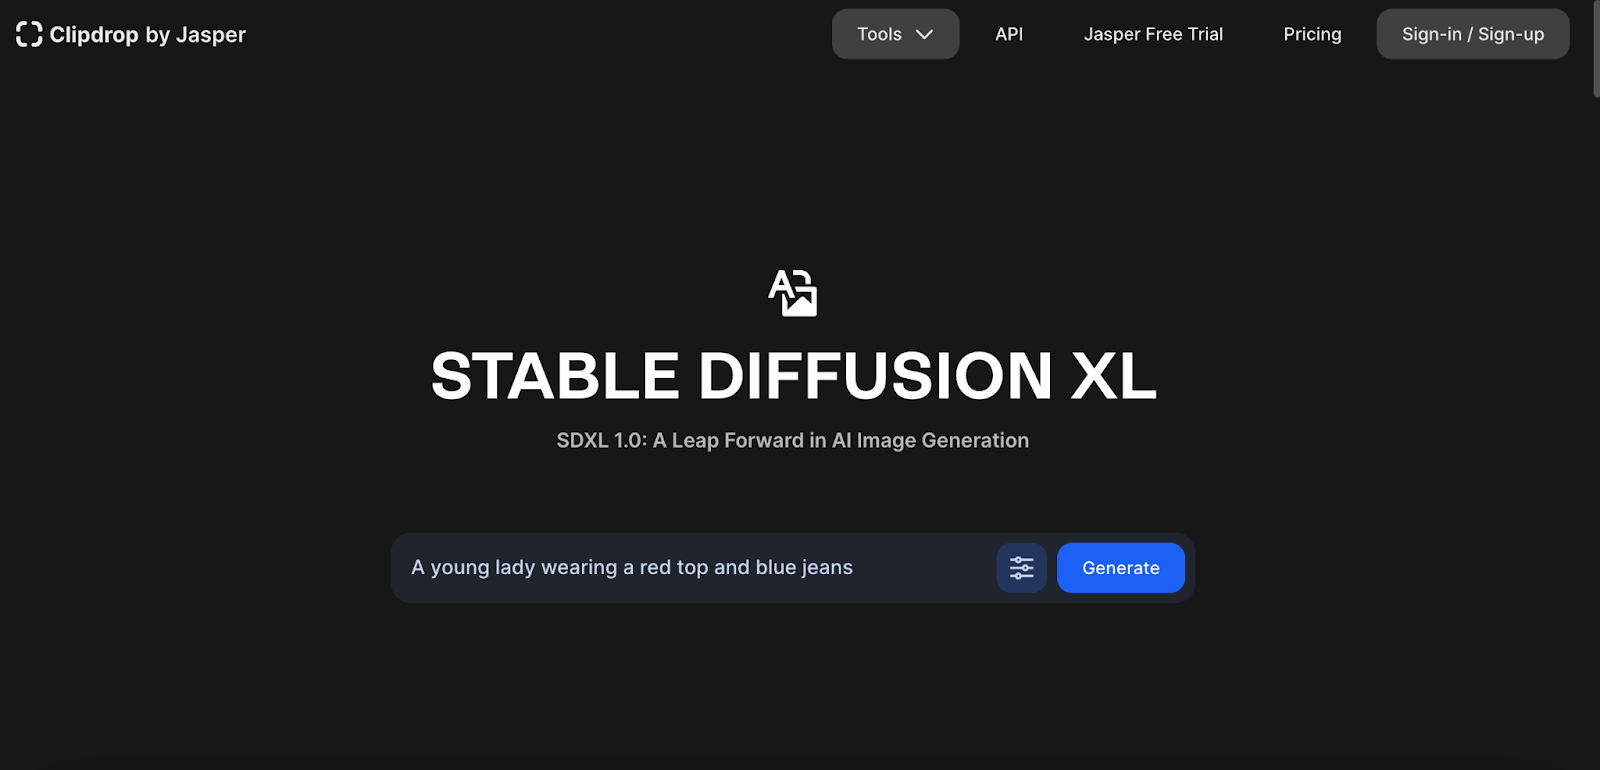
- To get started, visit Clipdrop and select Stable Diffusion XL, or simply click here.
- Input a prompt and click on the generate button.
- After a short wait, you'll have four AI-generated options to consider.
For additional customization, you can explore the Options icon within the prompt box:
- Select from various Styles including Anime, Photographic, Digital Art, Comic Book, Fantasy Art, Analog Film, Neon Punk, Isometric, Low Poly, Origami, Line Art, Cinematic, 3D Model, and Pixel Art.
- Choose your preferred Aspect Ratio from options like 21:9, 16:9, 3:2, 4:3, 1:1, 4:5, and 9:16.
- Optionally, enter a Negative Prompt to specify elements you don't want in your image.
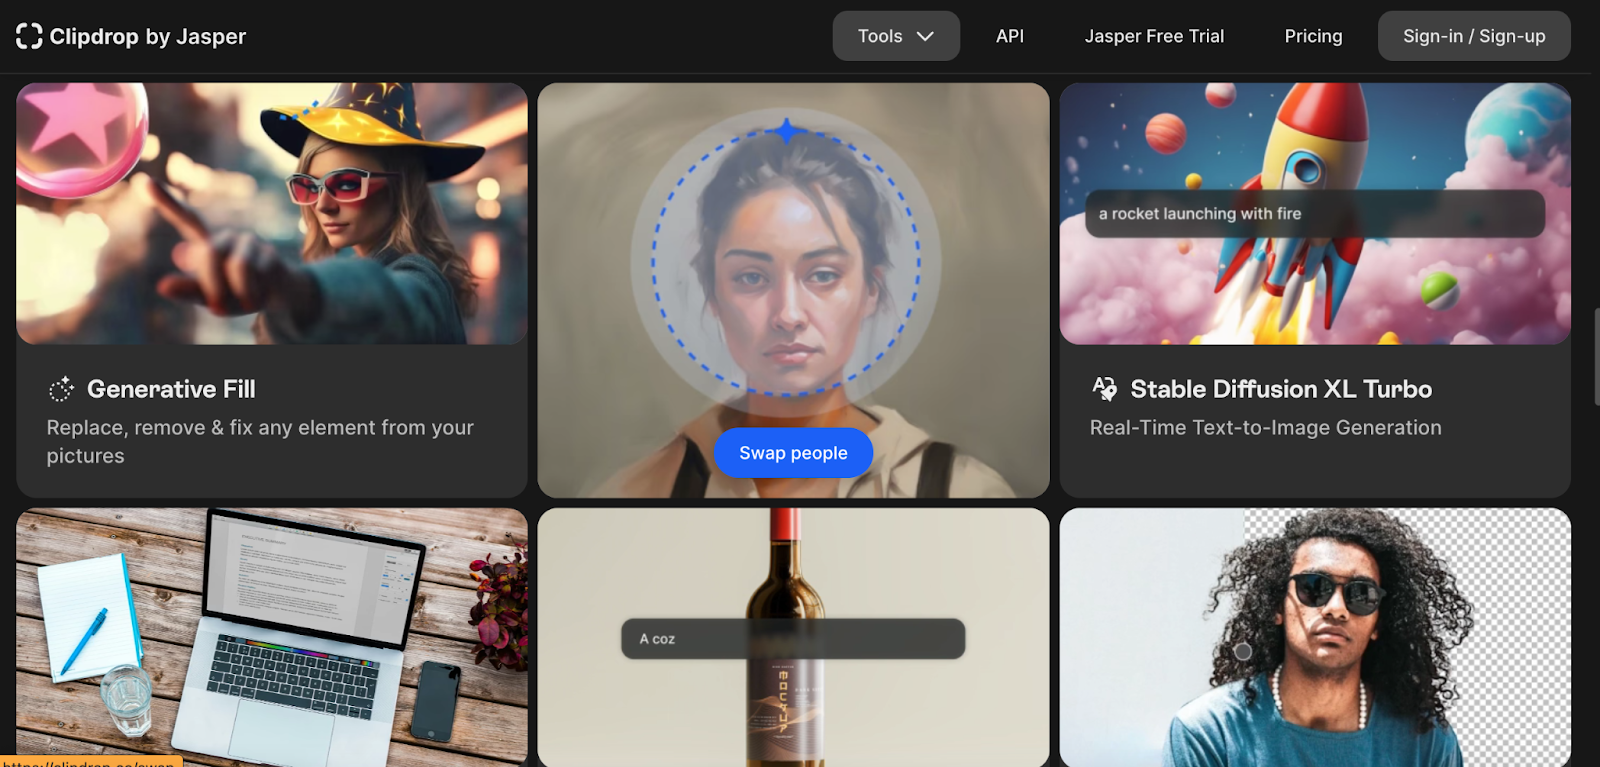
By signing up for a free Clipdrop account, you gain access to 400 watermarked images per day, along with other useful tools such as a background remover, image upscaler, and AI-powered relighting tool. For greater usage, consider the Pro plan starting at $9/month, which offers 1,500 unwatermarked images per day and unlimited access to most of Clipdrop's other tools.
However, for those seeking even more options, DreamStudio is worth exploring.
How to use Stable Diffusion with Dreamstudio
While Clipdrop offers convenience, I find DreamStudio, the official Stable Diffusion web app, to be preferable due to its enhanced control features and absence of default image watermarks. Here's how to sign up for DreamStudio:
- Visit https://dreamstudio.ai/generate.
- Close any pop-ups regarding new features and agree to the terms of service if prompted.
- Click on "Login" located in the top-right corner, and proceed to create a new account.
Upon registration, you will receive 25 free credits, which is adequate for experimenting with three different prompts and generating approximately 13 images using the default settings. Additional credits are available at a reasonable cost; $10 provides you with 1,000 credits. In the event that you exhaust your credits, you can also explore the option of running Stable Diffusion for free on your personal computer.
How to generate an image with Stable Diffusion in DreamStudio
Let's begin by generating your inaugural image. DreamStudio, located in the left sidebar, provides an array of controls, offering a broader range of options compared to DALL·E 2 or Clipdrop. However, let's start with something simple.

In the Style dropdown menu, you can select a specific style for Stable Diffusion to generate. The options are diverse, with the default choice being Enhance, which produces realistic, albeit not photorealistic, images—an excellent starting point. Alternatively, feel free to explore other styles such as Anime, Photographic, Digital Art, Comic Book, Fantasy Art, Analog Film, Neon Punk, Isometric, Low Poly, Origami, Line Art, Craft Clay, Cinematic, 3D Model, or Pixel Art. Enjoy experimenting!
The essential component is the Prompt box, where you input a description of what you want Stable Diffusion to create. While there's always a random suggestion available to spark inspiration (with the option to cycle through for more), feel empowered to enter your own ideas. Some intriguing prompts to consider include:
- A painting in the style of Vermeer depicting a large fluffy Irish wolfhound enjoying a pint of beer in a traditional pub.
- A Canadian man riding a moose through a maple forest, rendered in an impressionist painting.
- A high-definition digital art portrait of a cartoon purple cow.
Once your prompt is entered, you can temporarily disregard the other options and proceed to click on Dream.
(Note: The numerical indicator on the button signifies the number of credits required to generate the artwork with your chosen settings, with the default being 7.2.)
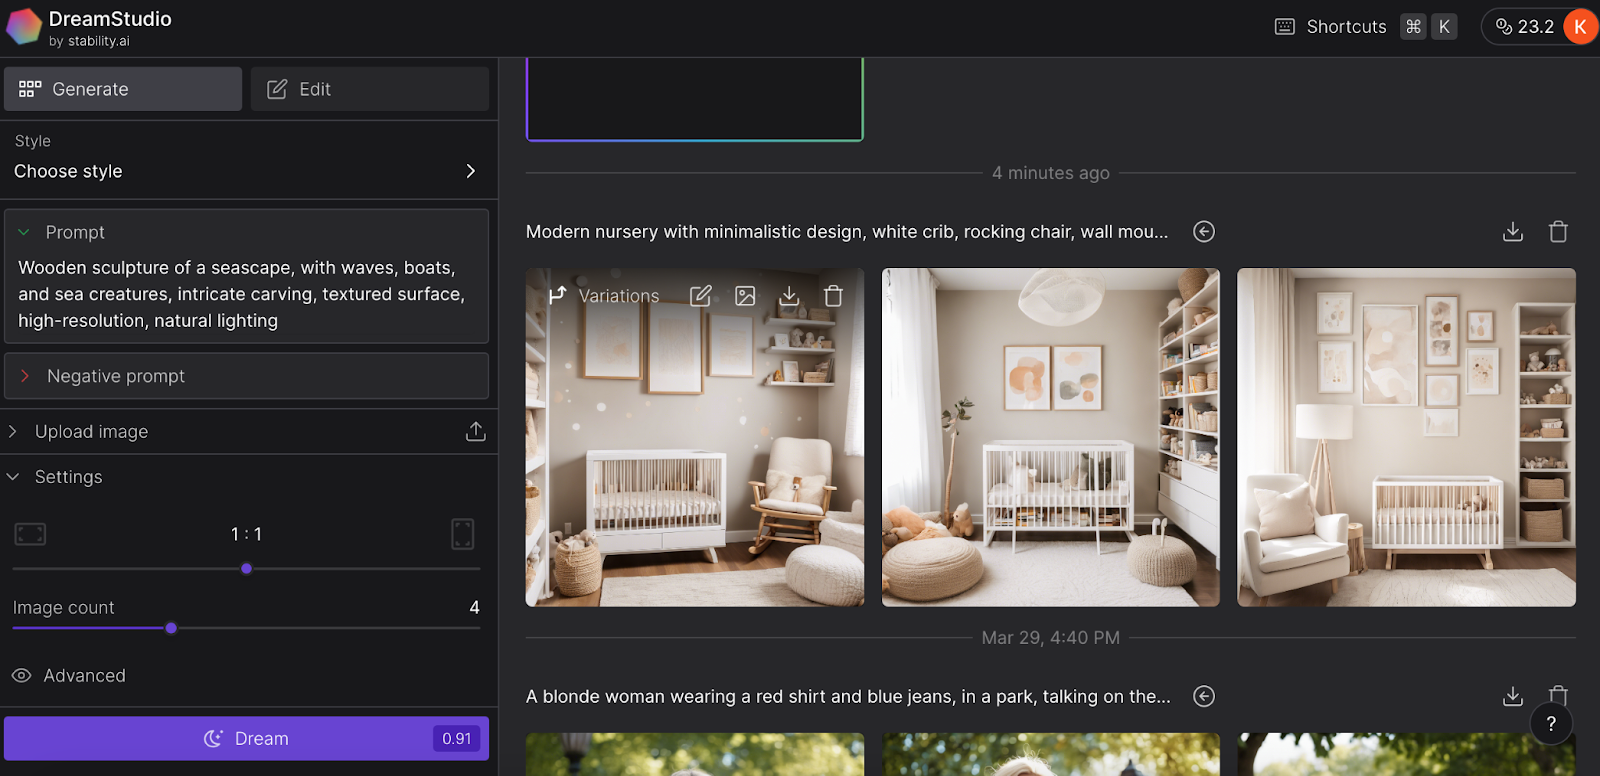
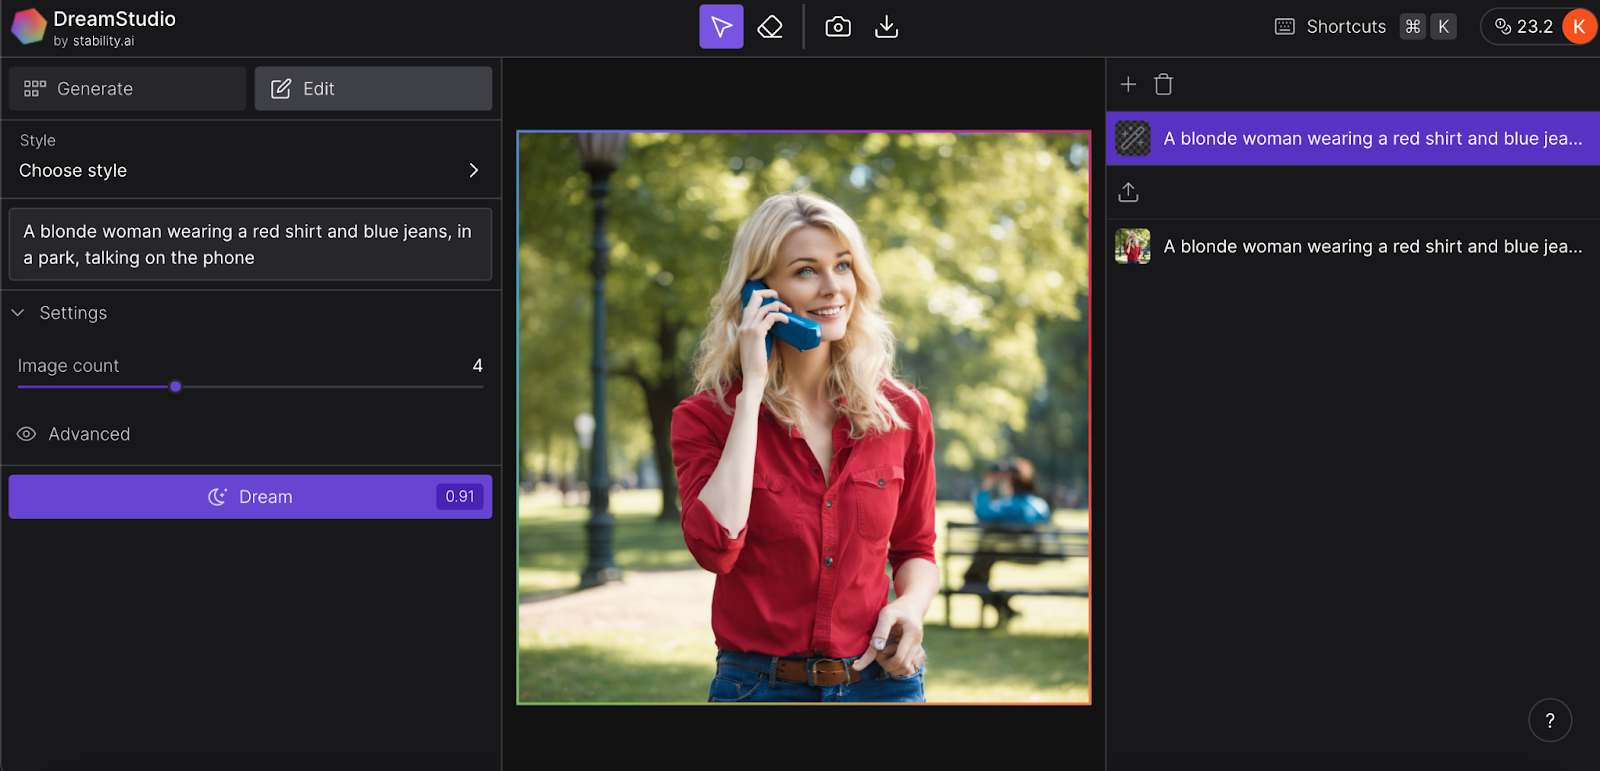
After a brief wait for DreamStudio to process, you'll be presented with four options to choose from. Select your preferred image, then utilize the buttons located at the top of the right sidebar to download it (and optionally upscale the resolution), reuse the prompt, generate additional variations, edit it, or designate it as the initial image—which incorporates it into the prompt.
Refine your image in Stable Diffusion
Although the Style options offer a degree of influence over the images generated by Stable Diffusion, the primary control lies within the prompts. Both Clipdrop and DreamStudio provide users with a selection of options in this regard.
Focus on the Prompt
The Prompt box holds utmost significance in the image generation process. To optimize its use, provide a detailed description of the desired image. Here are some considerations to keep in mind:
- Precision is key. Specify items precisely; for example, if you desire bananas, explicitly mention "bananas" rather than simply "fruit."
- Keep prompts concise and straightforward. Overly complex prompts may lead to confusion. Also, be mindful that current art generators may struggle with specific details such as quantities, sizes, and colors.
- Delve into the details. Include descriptors for various aspects such as subject, medium, environment, lighting, color, mood, and composition.
- Experiment and explore. The most effective way to grasp the process is through trial and error, so feel free to experiment with different approaches.
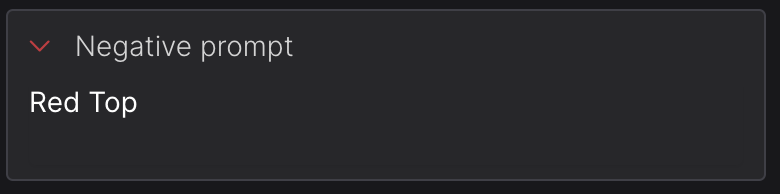
Use negative prompts
The Negative prompt box provides you with the opportunity to specify elements you prefer not to have included in your image. While it may not be as powerful as desired, it can still influence the direction of your generated images to some extent.
For instance, in the image mentioned above, I utilised "hills, grass, trees, fields, farms" as a negative prompt. Although certain backgrounds still contain these elements, their presence is notably reduced across the four images compared to when I solely use the prompt "a portrait of a purple cow, high definition digital art."
Use an image as part of the prompt with Dreamstudio
Within DreamStudio, the Image box empowers you to upload an image to integrate into the prompt. This feature offers significant control over the composition, color scheme, and other intricate details of the resulting image. Upon uploading an image, you can adjust the degree to which it influences the generated art. The default setting is thirty-five percent, which generally yields satisfactory results, although experimentation is encouraged.
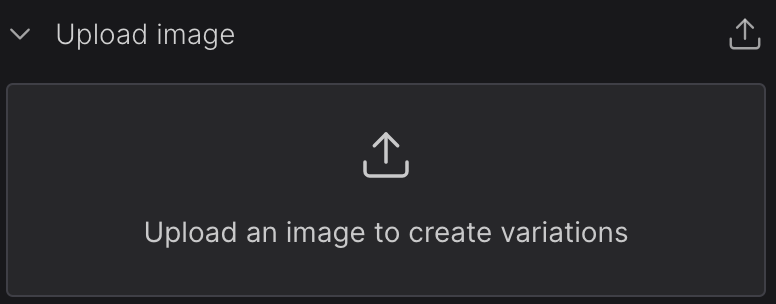
For instance, in the aforementioned images, I combined the prompt "a zombie running through the woods" with a photo of myself actively running through wooded terrain. The bottom options utilised an image strength of 35%, while the top options employed a strength of 70%. In both scenarios, you can observe the notable impact of the base image on the overall appearance of the generated images.
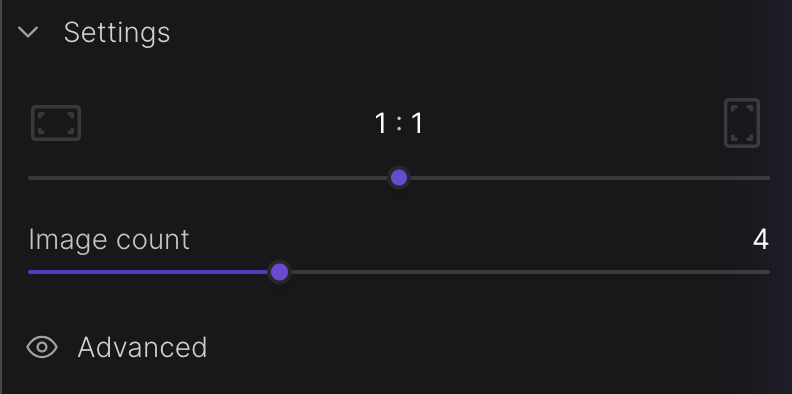
More Stable Diffusion image settings
Stable Diffusion offers several additional settings for customization, each of which influences the number of credits required for each generation.
Let's explore the fundamental settings first:
- Aspect ratio: By default, the aspect ratio is set to 1:1, but you have the flexibility to choose from options such as 7:4, 3:2, 4:3, 5:4, 4:5, 3:4, 2:3, and 7:4 for wider images.
- Image count: You have the freedom to generate anywhere from one to ten images for each prompt.
In the Advanced section, you'll find four additional options:
- Prompt strength: This determines the weightage given to your prompt during image generation, with a range from 1 to 30 (with the default typically around 15). In the provided image, you can observe prompt strength set to 1 (top) and 30 (bottom).
- Generation steps: This dictates the number of diffusion steps the model takes. Generally, more steps lead to better results, although the improvement diminishes with increasing steps.
- Seed: This parameter controls the random seed used as the basis for image generation, ranging from 1 to 4,294,967,295. Consistently using the same seed with identical settings produces similar results each time.
- Model: You have the option to select from five different versions of Stable Diffusion: 2.1, 2.1-768, SDXL 0.9, SDXL 1.0 (the default), and the SDXL Beta.
Although these settings may not require frequent adjustment, they offer valuable insights into Stable Diffusion's functionality when crafting prompts.
How to edit images with Stable Diffusion
DreamStudio offers support for both inpainting and outpainting techniques, enabling users to modify image details or extend them beyond their original boundaries. To utilise these features:
- Choose the Edit option located at the top of the left sidebar.
- Create a new image or import one from your computer.
- Utilise the arrow tool to select an area for inpainting or outpainting, input a prompt, and click Dream to generate four potential options for expanding your canvas.
- Alternatively, employ the eraser tool to remove a specific element from an image, and then replace it using a prompt.
While DreamStudio's inpainting and outpainting tools may not seamlessly integrate new AI generations as effectively as DALL·E 2, they still provide an enjoyable experience for experimentation. Moreover, they offer insight into the potential commercial applications of AI image generators in the coming years. However, for more robust editing capabilities, Adobe Photoshop's Generative Fill remains the preferred choice.
Going further with Stable Diffusion
Clipdrop provides a swift entry point to engage with Stable Diffusion, while DreamStudio offers a more intricate and detailed experience. However, these applications represent just a fraction of the myriad possibilities for exploring Stable Diffusion. If you find yourself captivated by its capabilities, delving deeper into the realm of possibilities—such as training your own model or installing it on your personal computer—allows for unlimited image generation without cost.
While Stable Diffusion continues to evolve and improve, exploring alternative options can also be rewarding. Consider exploring DALL·E 2 and Midjourney, two other prominent AI image generators. Additionally, Adobe has introduced its own AI model named Firefly, currently in beta. Although it may still be refining its features, its potential integration with Adobe's suite of applications like Photoshop presents exciting opportunities.